


Introduction
Rename a file in Excel can be a highly effective and time-saving solution, especially for professionals who frequently need to manage large volumes of files, such as reports, invoices, or project documents. By strategically leveraging various Excel file renaming techniques—such as batch renaming with Excel VBA, automating the process with Power Query, and utilizing Excel formulas for renaming files—you can not only streamline your workflow but also significantly reduce manual effort, thereby improving efficiency and accuracy.
In this step-by-step guide, we’ll walk you through how to rename multiple files using Excel efficiently. Plus, we’ll provide clear instructions and images to help you understand each method better. Whether you’re working with structured file names, managing large batches of files, or aiming to automate file operations, these proven strategies will not only help you streamline your workflow but also significantly boost productivity and save valuable time in the long run.
Additionally, for more in-depth file organization tips, you may find this Microsoft support article helpful.
Why Rename Files in Excel?
Excel allows you to automate and streamline various tasks, including renaming files. There are several compelling reasons why renaming files in Excel can be beneficial:
- Organizing data systematically – Keeping files well-structured ensures easy access and retrieval.
- Standardizing file names for better tracking – Maintaining consistency makes it easier to find and manage files.
- Managing multiple files efficiently – Reducing clutter and improving workflow can save significant time.
Methods to Rename a Files Using Excel
There are multiple ways to rename a file using Excel. Let’s explore the most effective methods.
1: Rename Files Manually in Windows Explorer
2: Using Excel to Track and Assist in File Renaming
Method 1: Rename Files Manually in Windows Explorer
If you are tracking file names in Excel and, at the same time, need to rename them manually, then follow these steps.
- Open Windows Explorer and Navigate to the Folder – Locate the folder where the files are stored.
- Find the File You Want to Rename – Scroll through the list and identify the specific file.
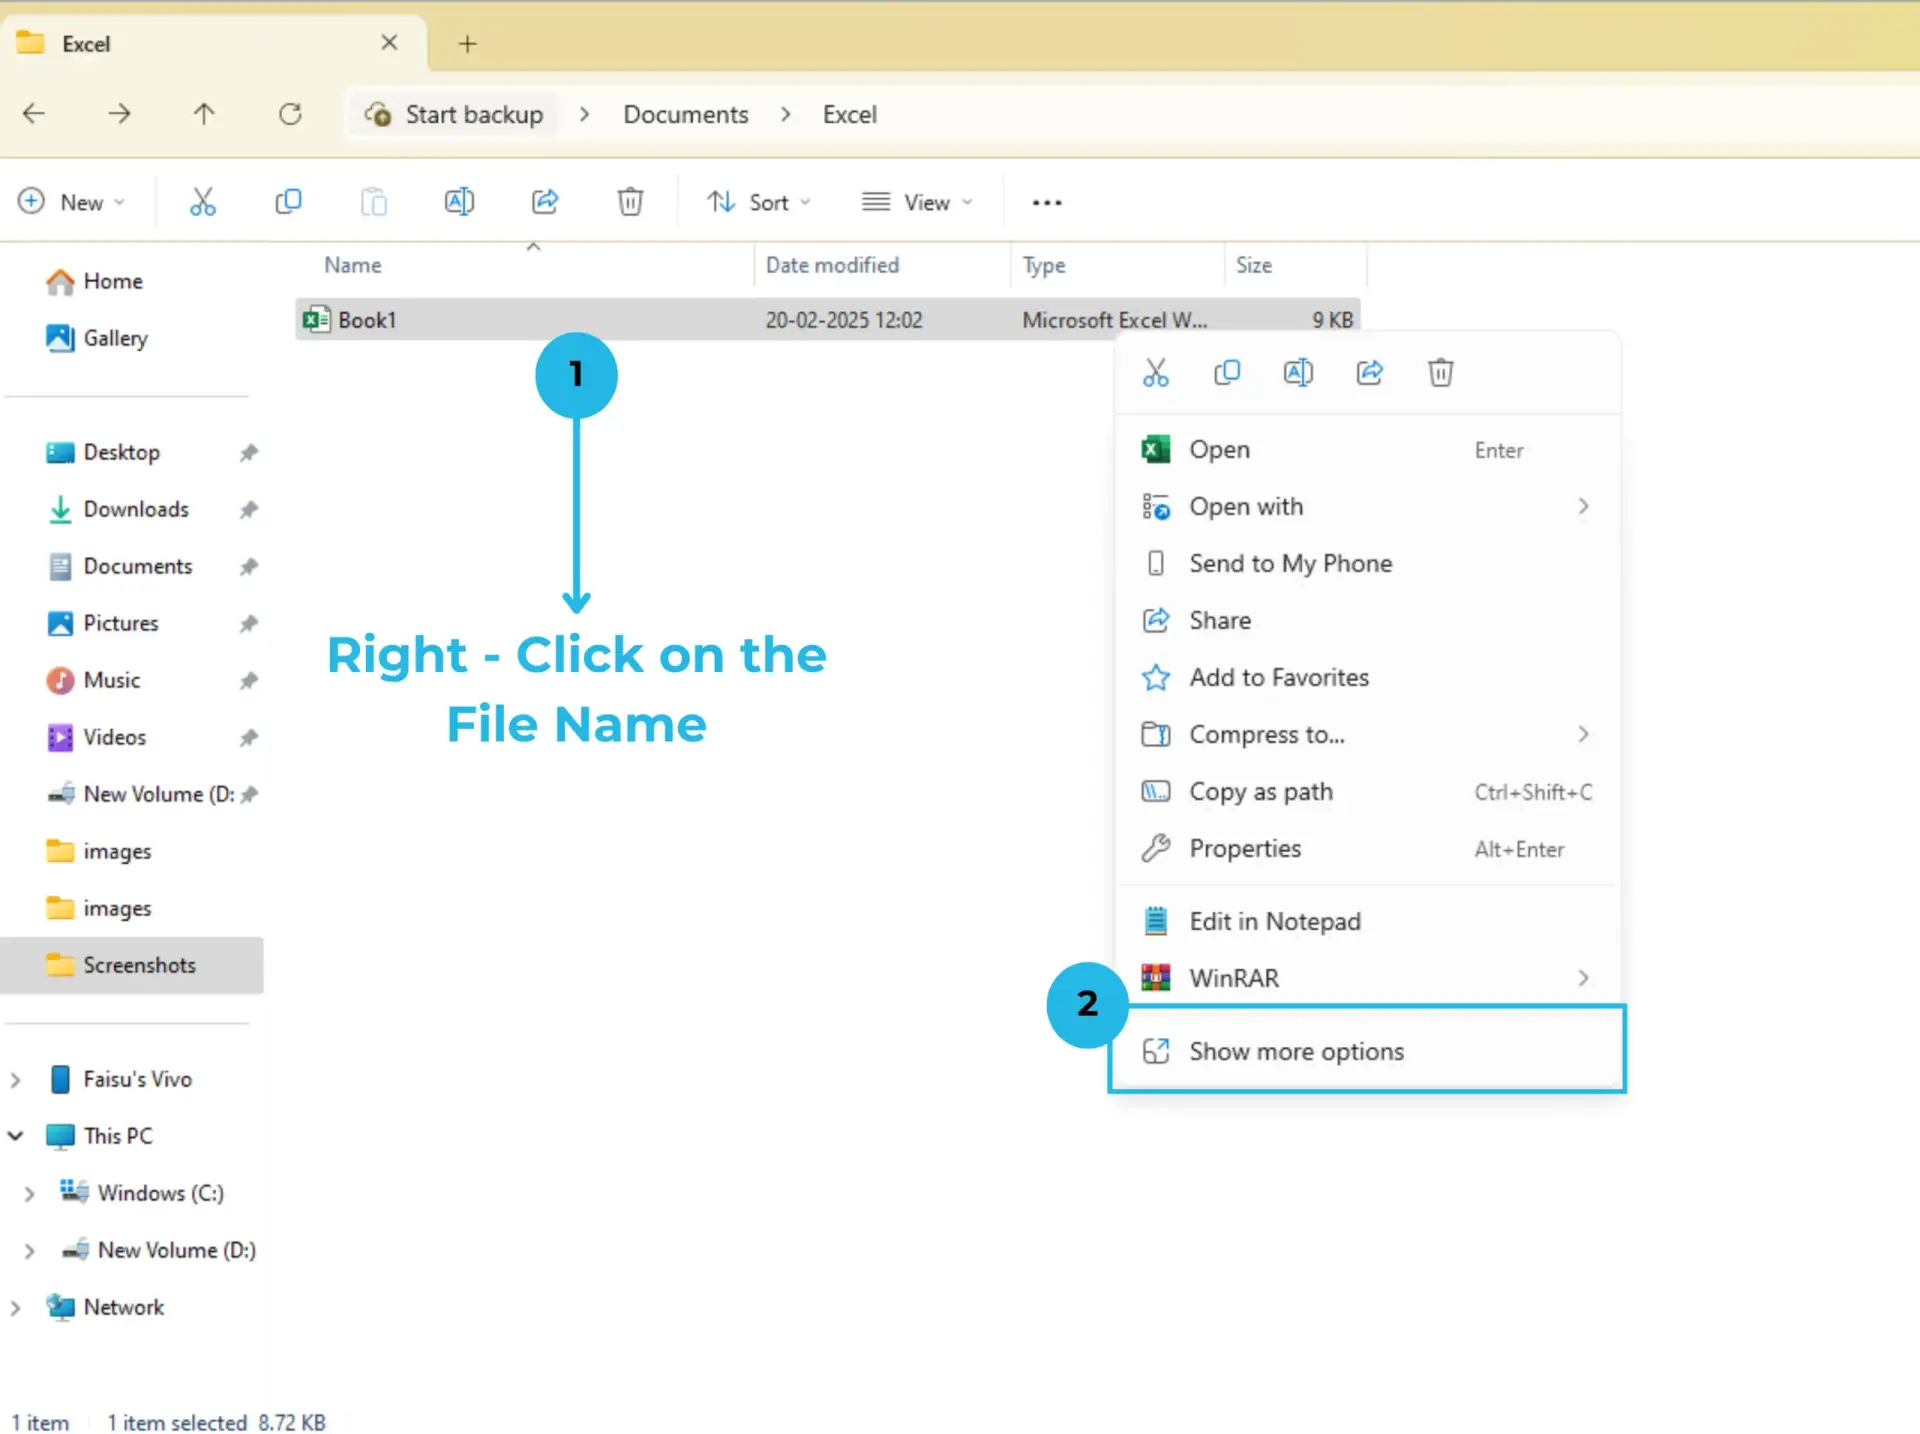
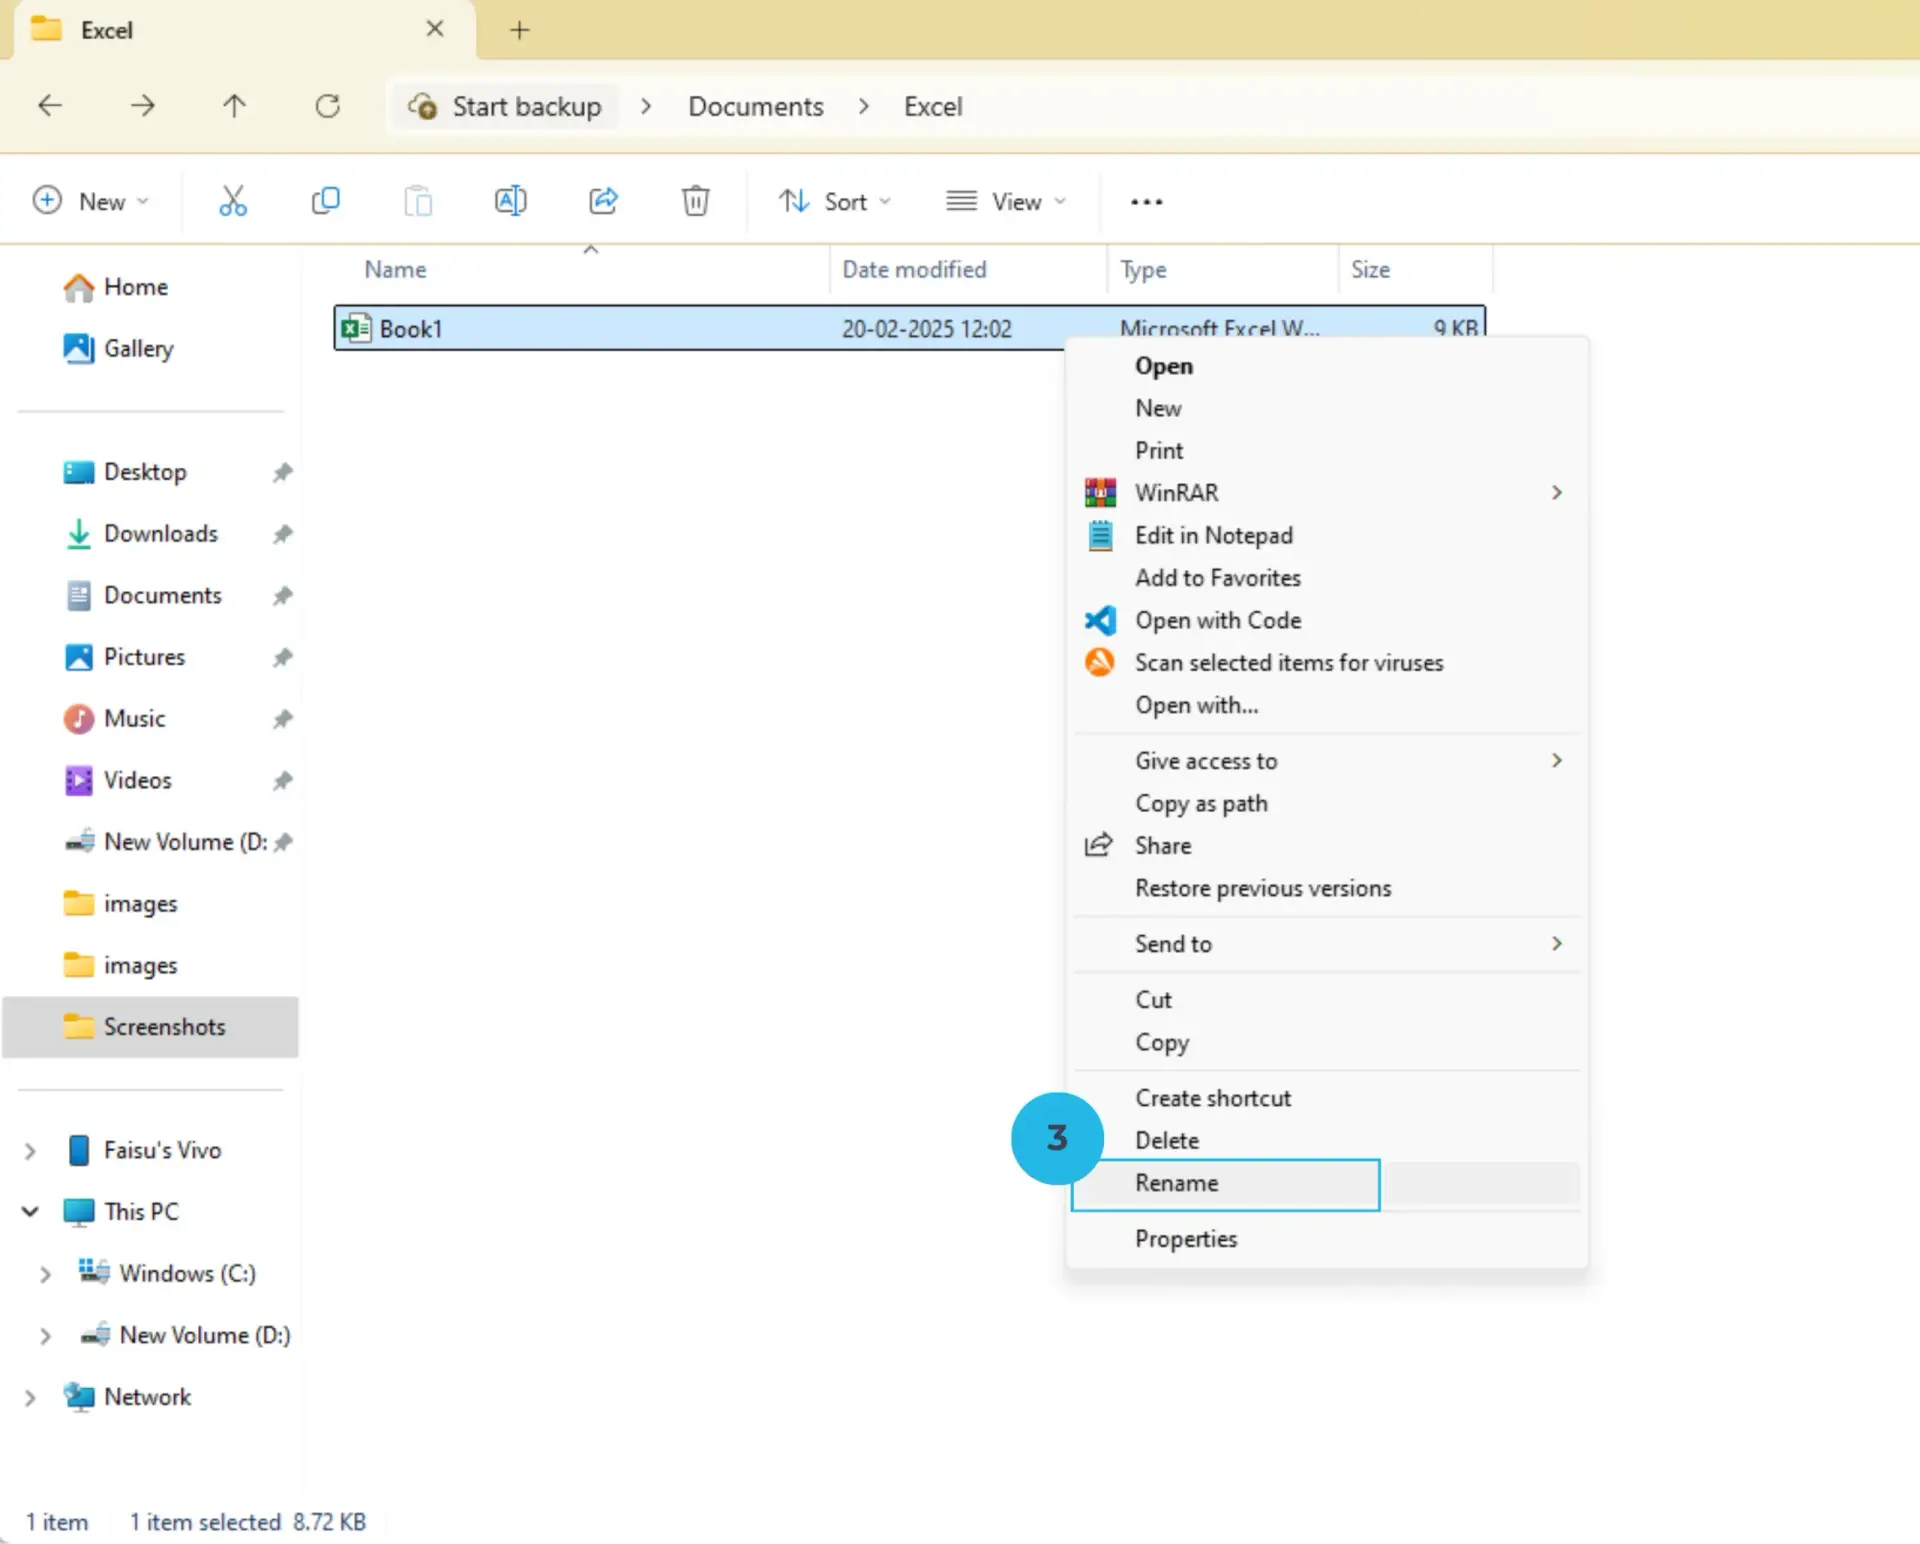
- Right-click on the File and Select “Rename” – This will enable editing mode.
- Type the New Name and Press Enter – Ensure the new name aligns with your Excel records for consistency.
Method 2: Using Excel to Track and Assist in File Renaming
Rather than renaming files randomly, Excel can help you organize and rename them in a structured way.
Step 1: List File Names in Excel
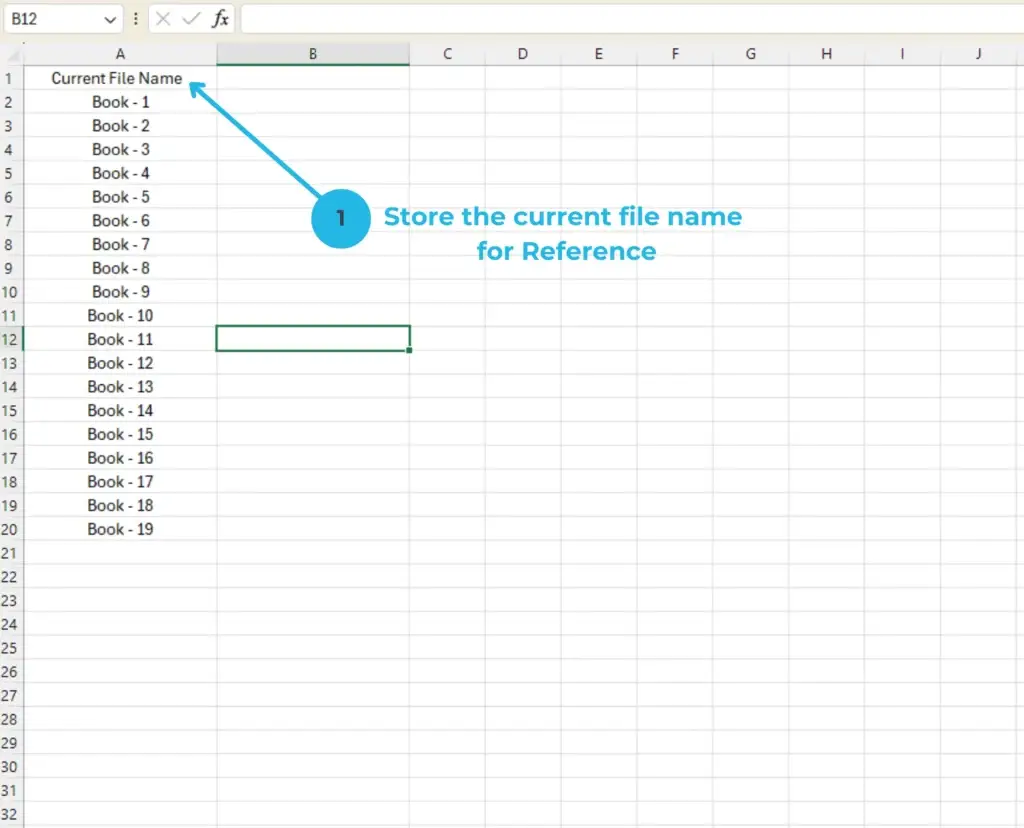
- Open a New Excel Workbook – Launch Excel and start a new spreadsheet.
- Create a Column for Current File Names – Label this column to store existing file names.
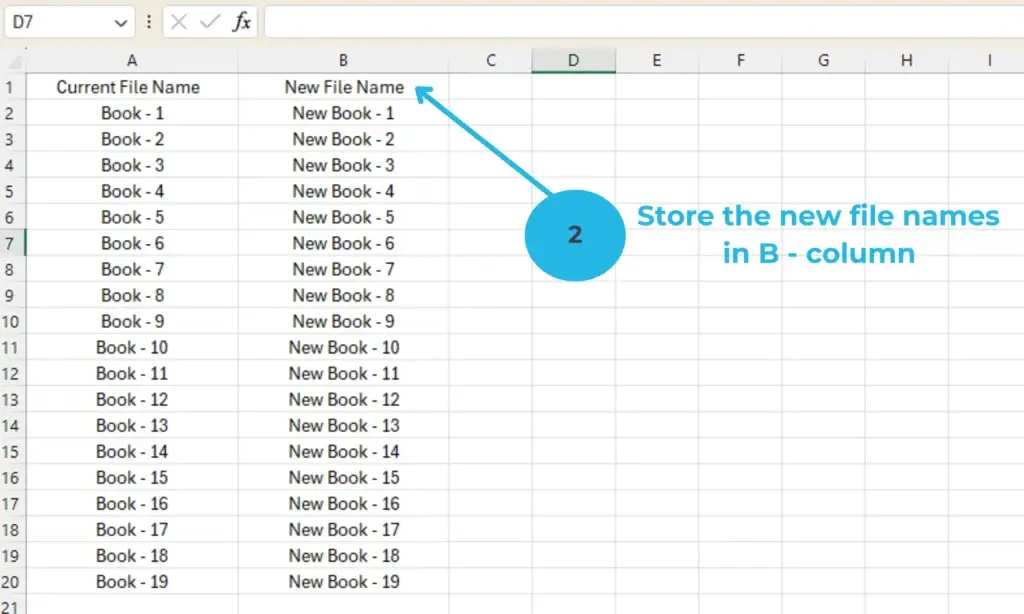
- Create Another Column for New File Names – This column will contain the updated names.
- Enter the Existing and New File Names – Carefully input the file names to avoid errors.
Step 2: Use Excel to Guide Manual Renaming
Once your list is ready, follow these final steps to rename files accurately:
- Open the Folder Where Your Files Are Stored – This ensures you have quick access to the files.
- Refer to Your Excel List for the Correct File Names – Double-check the names before making changes.
- Manually Rename Each File Using the List – Rename each file one by one to match the list.
- Double-check the Names for Accuracy – Finally, verify that all files have been renamed correctly.
Best Practices for Renaming Files in Excel
To improve file management, it is important to follow a few key best practices. First, to ensure better compatibility across different systems, it is recommended to avoid special characters and instead use underscores (_) in place of spaces. Additionally, keeping file names descriptive is essential, as it helps with easier identification and retrieval of documents. Furthermore, before making any significant changes, always remember to create a backup to prevent potential data loss and maintain data integrity.
Conclusion
By following these methods, you can efficiently rename files using Excel. Whether manually renaming or using Excel as a tracking tool, these techniques will help you stay organized and improve workflow efficiency. Try them out and see how Excel can make file management easier!
Did you find this guide helpful? Stay tuned for more Excel tips and tricks from PivotXL!
