


Introduction To Data Cubes
Data cubes are a powerful and efficient way to store and retrieve data, particularly for finance professionals seeking structured and multidimensional insights. While many technical professionals rely on SQL for data storage and retrieval, data cubes offer a more tailored approach for managing complex financial data.
In this article, we’ll cover:
- The fundamentals of creating data cubes.
- Step-by-step guidance on adding dimension members to a data cube.
- Techniques for building multiple dimensions within a data cube.
- How to add specialized dimensions and define them effectively for enhanced data analysis.
What You’ll Learn in This Post:
- What Data Cubes Are:
- Understand the basics of data cubes and how they help organize financial data for better insights.
- How to Add Dimensions to a Cube:
- Learn how to set up dimensions like Accounts, Scenarios, and Time to structure your data.
- Adding Dimension Members:
- Find out how to add specific details, like chart of accounts or budgets, into each dimension.
- Specialized Time Dimensions:
- See how to create a Time dimension to track data by month, year, or other time periods.
- Creating a Cube in PivotXL:
- Step-by-step instructions on how to build a data cube and customize it in PivotXL.
- Adding Measures for Analysis:
- Learn how to create measures that calculate and summarize financial data.
This post will show you how to easily create and use data cubes in PivotXL for smarter financial analysis.
Creating a Cube in PivotXL
Once you log into the application, you can easily create a cube by following these steps:
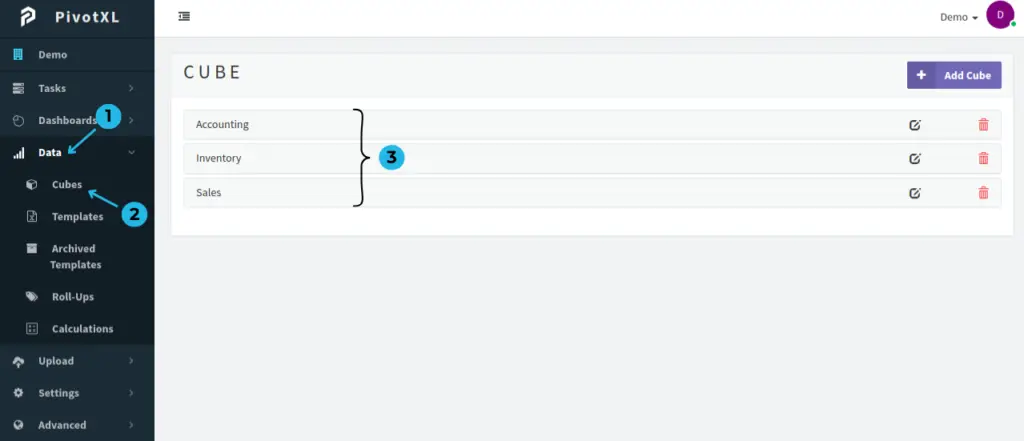
- Click on Data in the left-side menu.
- Click on Cubes under the Data menu.
- You will see a list of the cubes that have been created here.
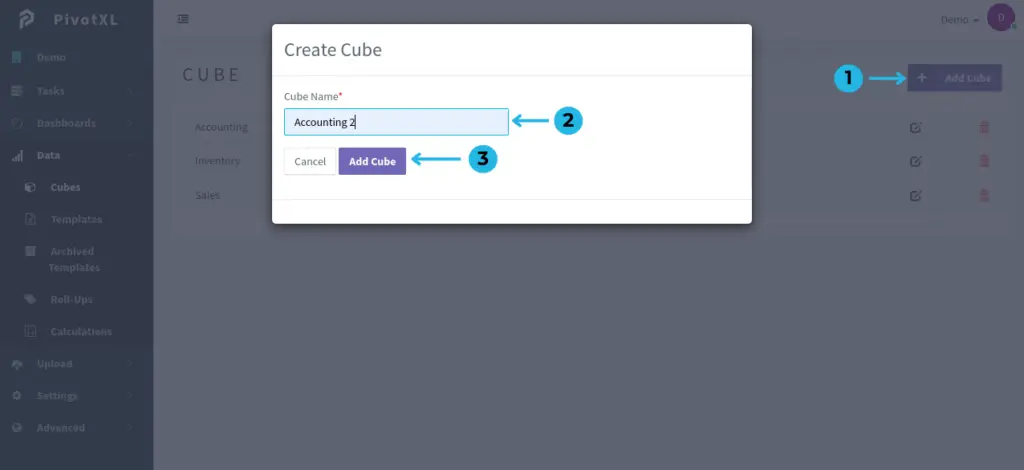
- Click the Add Cube button to create a new cube, Now the pop-up will be open.
- Enter the name of the cube in Cube Name Field.
- Click the Add Cube button to create a new cube.
Creating Dimensions Within a Cube?
After creating a cube, the next step is to define its dimensions, which will vary based on the specific use case. For example, in a simple trial balance for budget-to-actuals analysis, the dimensions could include:
- Accounts – Mimics the Chart of Accounts
- Scenario – Budget, Actuals, Forecast
- Time (a Specialized Dimension) – Monitoring Time across fixed and relative time and YTD and YTG calculations.
- Value of Amount (for storing the actual value)
Each cube can have multiple dimensions tailored to its purpose. Below are the steps to create a dimension for your cube.
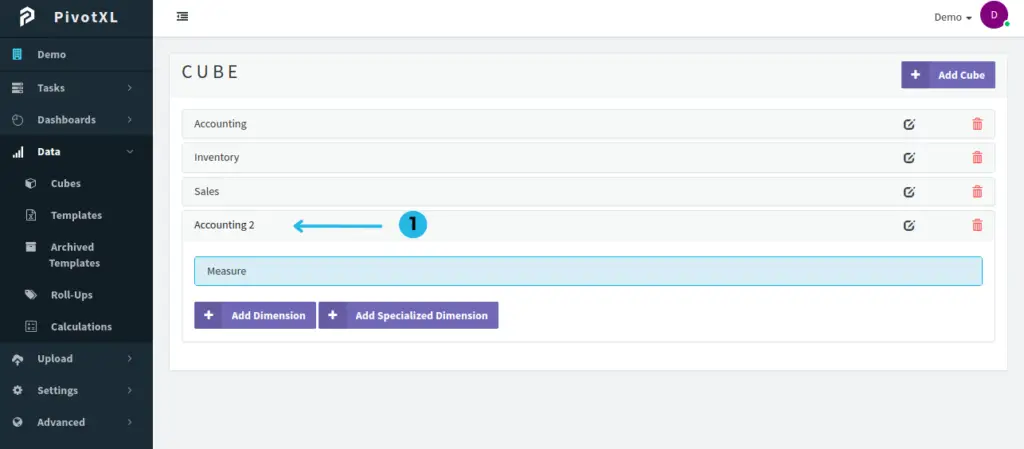
- Click on the cube to add a dimension.
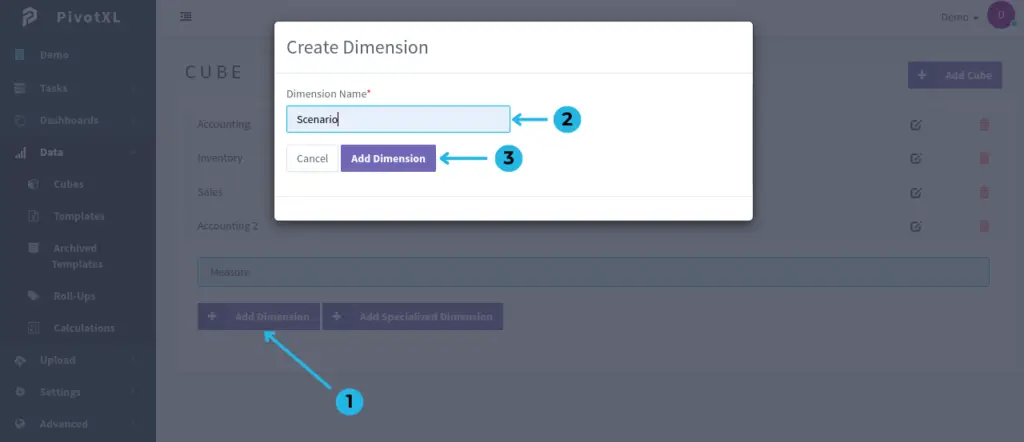
- Click the Add Dimension button. A pop-up page will open.
- Enter the name of the dimension you want to add.
- After entering the name, click the Add Dimension button. The dimension will then be added to the cube.
Creating Dimension Members for each Dimension
Once the dimensions are created, the next step is to define the dimension members within each dimension. These members represent the specific data points or categories relevant to the dimension. For example:
- The Accounts dimension will include the chart of accounts as its dimension members.
- The Scenario dimension will include Budget, Actuals, and Forecast as its dimension members.
Defining dimension members ensures that the cube is populated with the necessary details to support meaningful analysis.
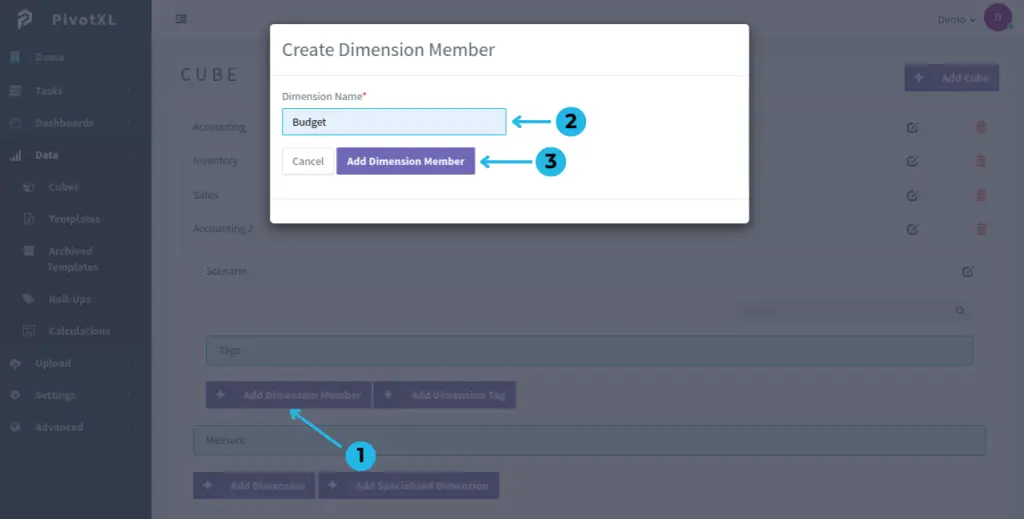
- Click the Add Dimension Member button. A pop-up will open.
- Enter the Dimension Member name
- Click the Add Dimension Member button, and the dimension member will be added.
Creating Specialized Dimensions for Time
Time is a specialized dimension in PivotXL, offering advanced capabilities for managing temporal data. Within the Time dimension.
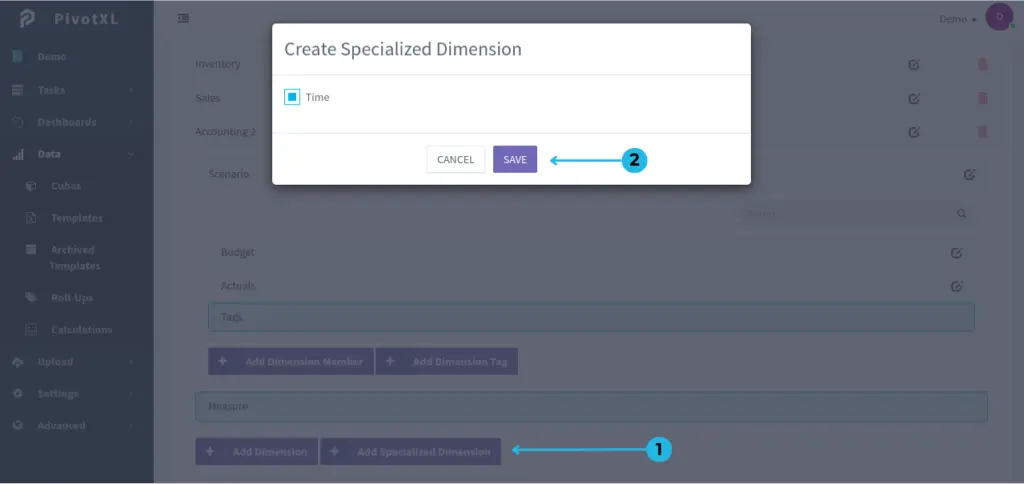
- Click Add Specialized Dimension button. A pop-up will open.
- Click the Save button to create a Specialized Dimension Time. This is useful for calculating data on a month- and year-wise basis.
Creating A Measure
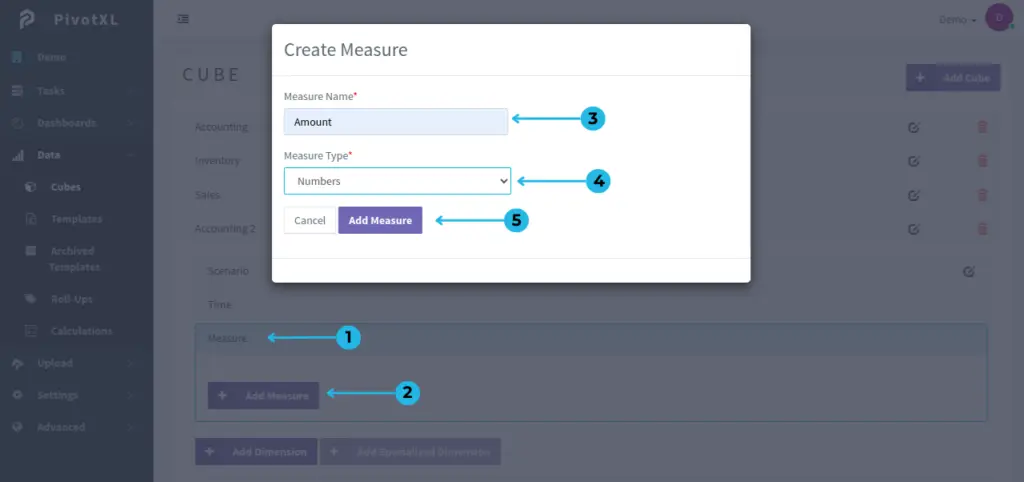
- Click on Measure. The Add Measure button will be displayed.
- Click the Add Measure button. A pop-up will open.
- Enter the name in the Measure Name field.
- Select the Measure Type in the field.
- Click the Add Measure button to create the measure.

