


Introduction
If you’re starting with Excel, you might have encountered the CELLS function, but you might not be quite sure how it works. Therefore, this guide will take you through a step-by-step tutorial on using the CELLS function in Excel. As a result, by the end, you’ll understand how to use this function efficiently to enhance your spreadsheets.
What is the CELLS Function in Excel?
Before we get into practical examples, let’s first understand what the CELLS function does.
To begin with, the CELLS function is part of Excel’s cell reference functions and helps return specific information about a cell, such as its address, format, or contents. In fact, it is especially useful when working with dynamic datasets and automated reports.
Syntax of the CELLS Function
To use the CELLS function, apply the following syntax:
=CELL(info_type, [reference])Now, here’s what each argument means:
- info_type: This tells Excel what information you need about the cell. Common values include:
- “address” – Returns the absolute reference of the cell.
- “col” – Returns the column number of the cell.
- “row” – Returns the row number of the cell.
- “contents” – Displays the value inside the cell.
- reference (optional): The cell you want to analyze. If omitted, Excel uses the last active cell.
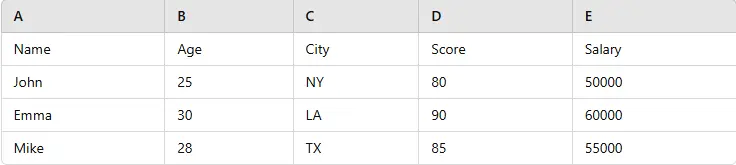
Sample Dataset Excel CELLS Function
Step-by-Step Guide to Using the CELLS Function
1. Getting the Address of a Cell
First, if you want to find out the address of a specific cell, use this formula:
=CELL("address", A1)
Example Output:
If A1 contains a value, the formula will return something like "$A$1".
📌 Tip: This is helpful when working with large datasets and needing to reference specific cells dynamically.
2. Finding the Column Number of a Cell
Next, to determine the column number of a cell, use:
=CELL("col", B5)
Example Output:
If you enter this formula for cell B5, Excel will return 2, as column B is the second column in the worksheet.
3. Identifying the Row Number of a Cell
Then, to find the row number of a given cell, apply:
=CELL("row", D10)
Example Output:
If you place this formula in any cell, Excel will return 10, indicating that cell D10 is in the 10th row.
4. Displaying the Contents of a Cell
Finally, if you need to display the content of a specific cell, use:
=CELL("contents", E3)
Example Output:
If cell E3 contains the number 250, this formula will return 250.
📌 Tip: This is useful for validating whether a cell contains data before running further calculations.
Common Use Cases for the CELLS Function
Now that you’ve learned the basics, let’s look at some practical applications.
- Data Validation: Ensure certain cells contain values before applying formulas.
- Automated Reports: Use dynamic references for better report formatting.
- Error Checking: Identify empty cells and troubleshoot issues in large datasets.
Conclusion
Mastering the CELLS function helps you work more efficiently. Furthermore, it enhances data analysis, reporting, and automation. In addition, try different info_type values to see its full potential. Moreover, use it with other functions for better results. Additionally, experiment with real datasets to improve your skills. Finally, keep practicing to become an Excel expert!
Do you use the Treemap Chart in Excel for your reports? If so, let us know.
