


Efficient user management is essential for maintaining control and collaboration within your organization, and PivotXL simplifies this process. From adding and removing users to managing access controls and auditing user activity, the platform offers comprehensive tools for seamless administration.
Adding and Removing Users
Easily onboard new users by assigning roles and permissions that align with their responsibilities. If a user’s access is no longer required, remove them instantly to maintain data security and integrity.
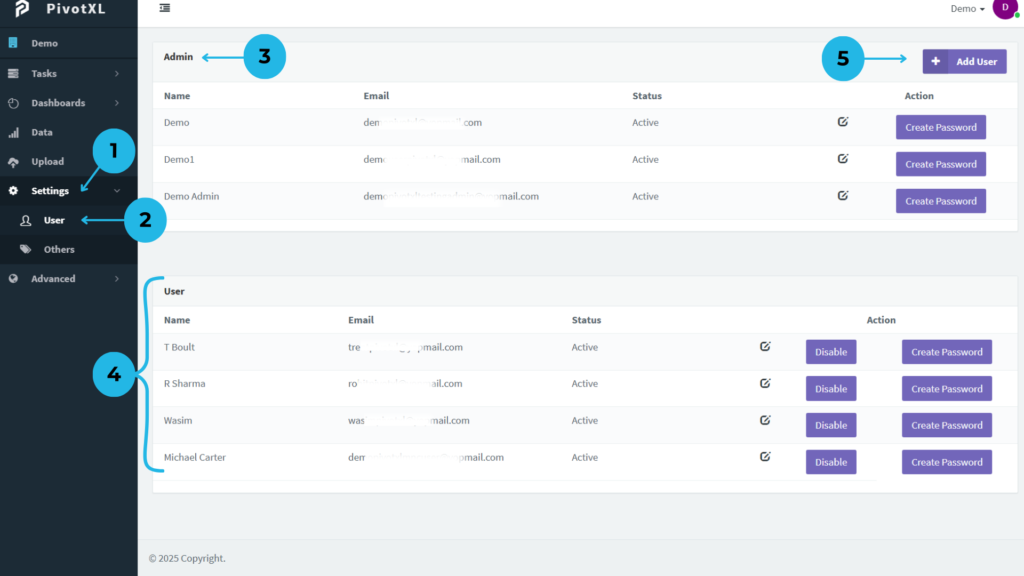
1.Navigate to Settings from the left-hand menu to explore configuration options.
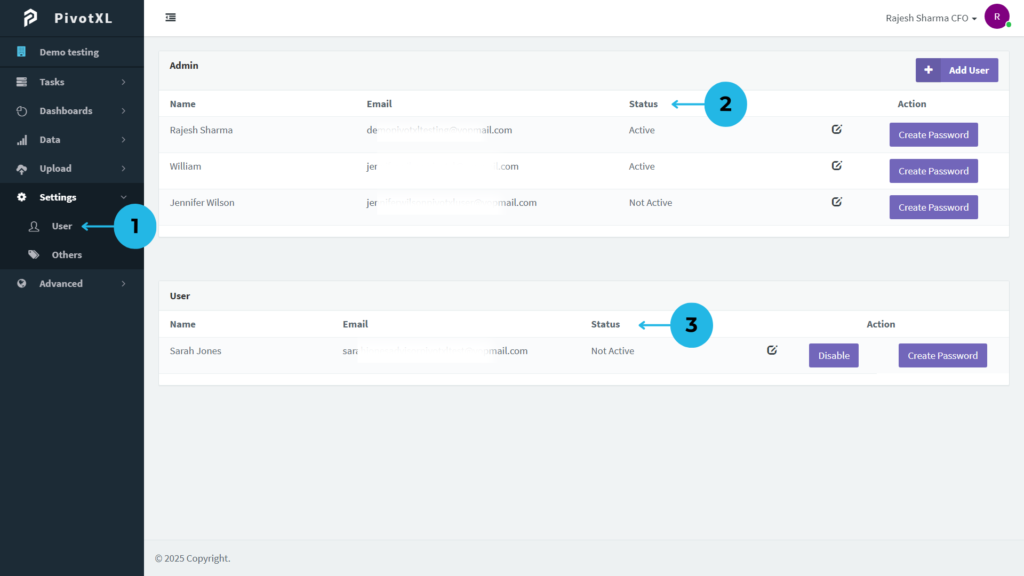
2.Click on the User menu to manage user accounts.
3.View a comprehensive list of Admin users along with their account details.
4.See detailed information about Non-Admin user accounts.
5.Click the Add User button to effortlessly onboard a new user into your organization.
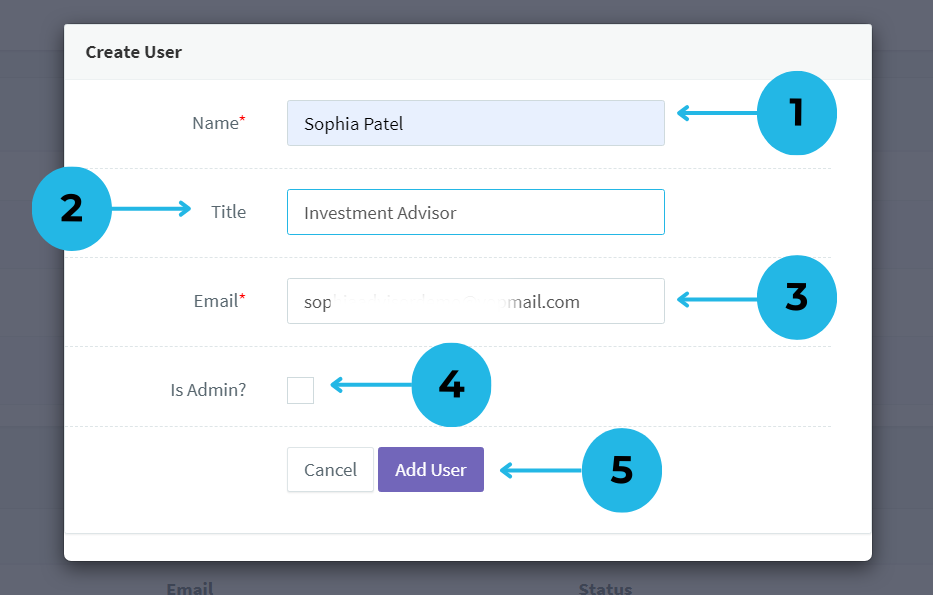
- Enter the User Name for identification.
- Provide the User Title to specify their position within the organization.
- Enter the User Email to set up the account on PivotXL. Once the user is added, PivotXL will automatically send an invitation email to the provided address for account activation.
- Select User Type by marking the Admin checkbox if the user requires administrative access. Leave it unchecked for Non-Admin users
- Review User Details to ensure accuracy, then click the Add User button to successfully create the user account.
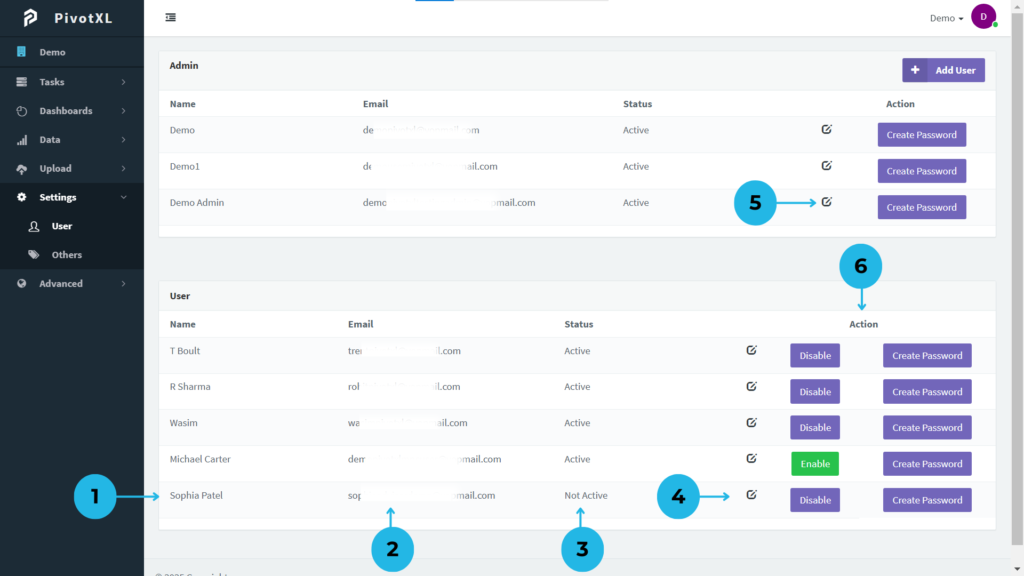
1.The Non-Admin User account is successfully created, displaying the user’s Name under the Name section.
2.The user’s Email appears under the Email section for quick reference.
3.The Status section indicates the current account status of the user.
4.Click on the Edit icon to easily modify user account details.
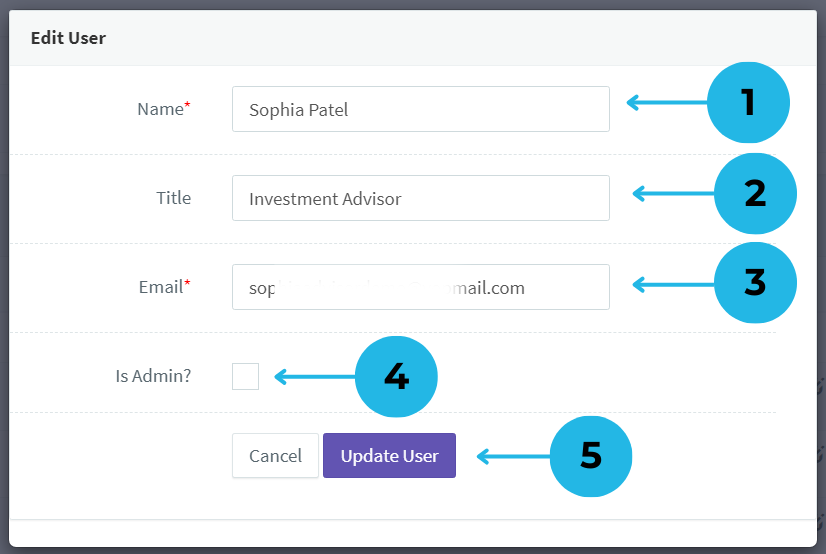
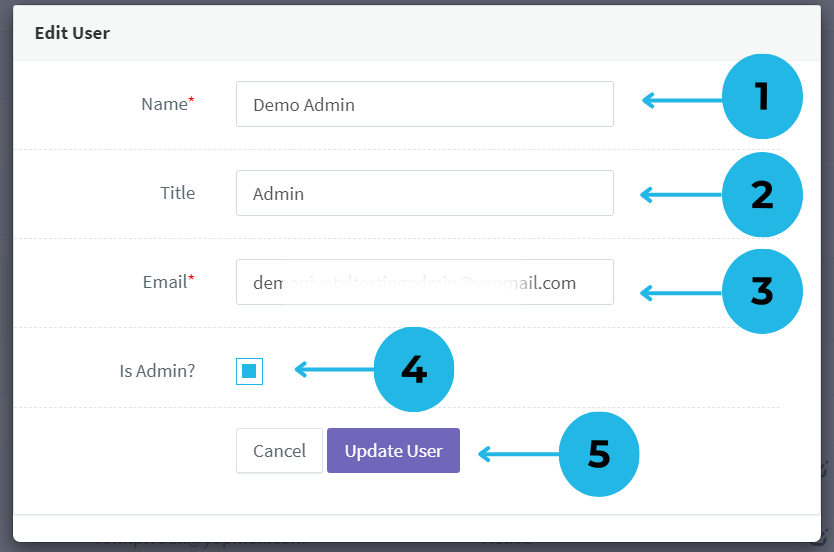
- Easily update the user’s name.
- Modify the user’s title or role.
- Keep the user’s email address accurate by editing it as needed.
- Assign or remove admin access for the user.
- Click “Update User” to apply all modifications.
5.Similar sections for Admin users display Name, Email, and Status, with the ability to click the Edit icon to manage Admin user accounts.
- Easily update the user’s name.
- Modify the user’s title or role.
- Keep the user’s email address accurate by editing it as needed.
- Assign or remove admin access for the user.
- Click “Update User” to apply all modifications.
6.The Action section provides options for Access Control and a convenient Forgot Password setup.
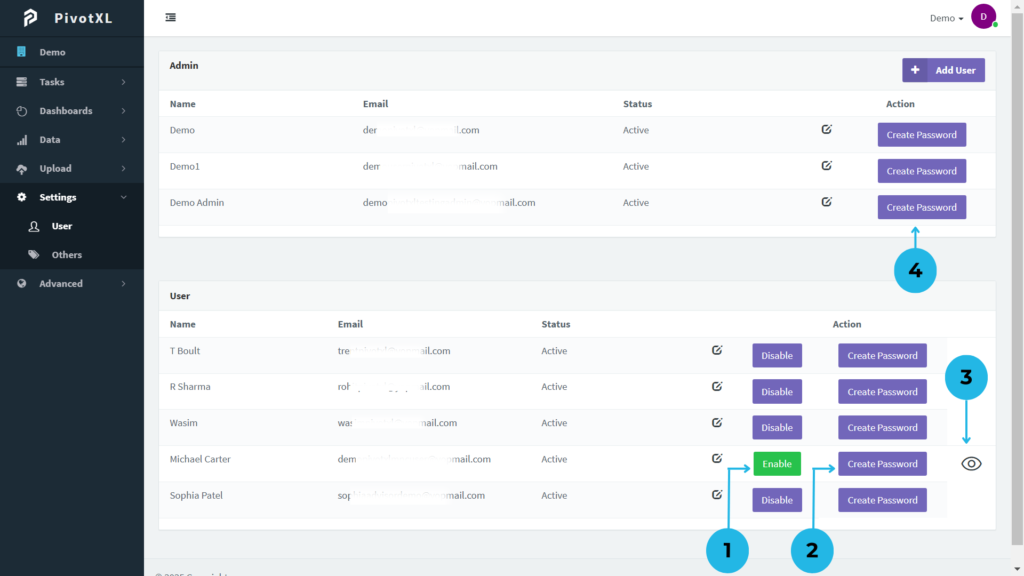
1.Easily enable or disable user access by clicking the Disable or Enable button in the Users menu under Actions.
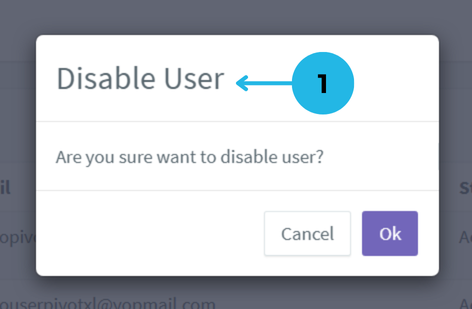
1.A pop-up will appear to confirm disabling the user. Click OK to proceed.
2.Forgot password? Click Create Password to instantly generate a new password for the user.
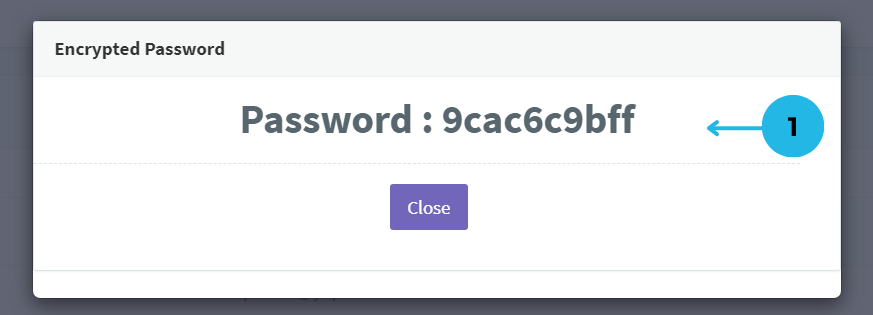
3.Click the View Password icon to see the new password in a pop-up and share it with the user for seamless login.
- The newly generated password is securely displayed in a pop-up for secure sharing.
4.Forgot the Admin password? Simply use the Create Password feature to generate a new password effortlessly.
Managing Access Controls
Control who can access, view, and edit data within PivotXL. Assign roles that define the level of permissions, ensuring sensitive information is available only to authorized users. This streamlined role-based access management improves security and operational efficiency.
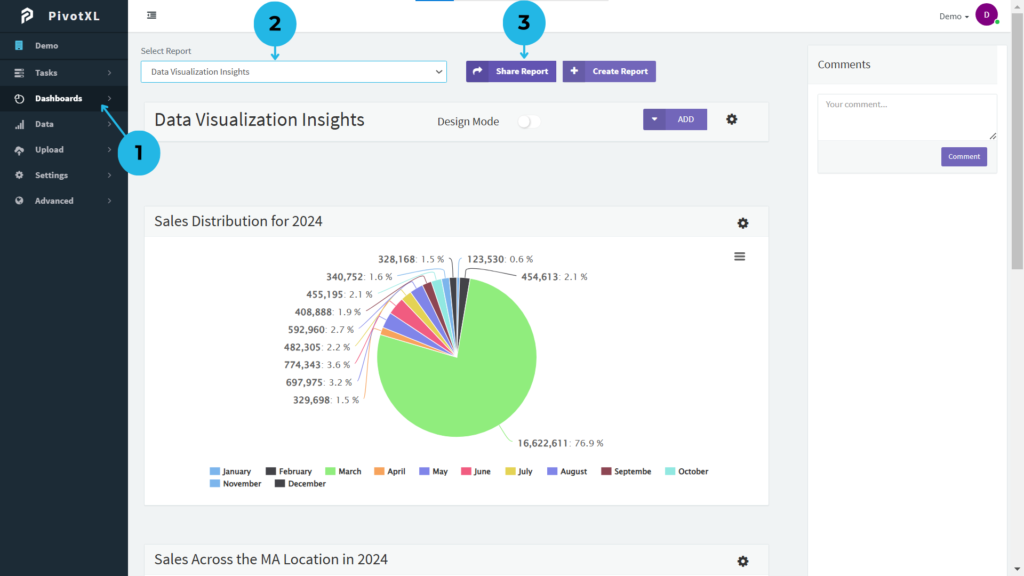
1.Navigate to the Dashboard from the left-side main menu.
2.Choose the desired report from the dashboard for sharing.
3.Click the Share Report button to share reports with all or specific Non-Admin Users.
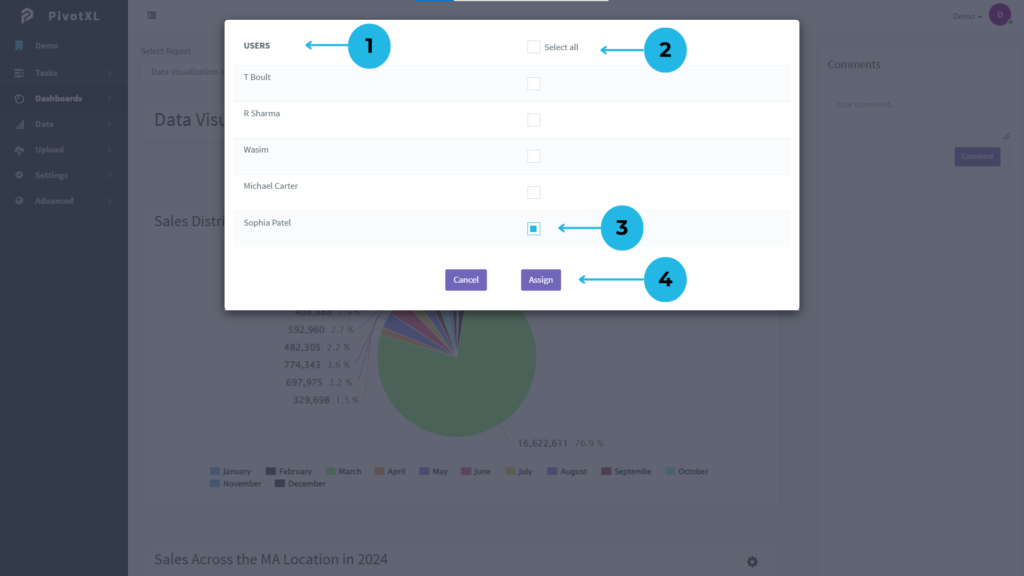
1.A new pop-up displays the list of available Non-Admin Users for report sharing.
2.Use the Select All checkbox to share the report with all users.
3.Alternatively, check individual boxes next to users to select specific ones for report sharing.
4.Click the Assign button to share the report and provide access seamlessly.
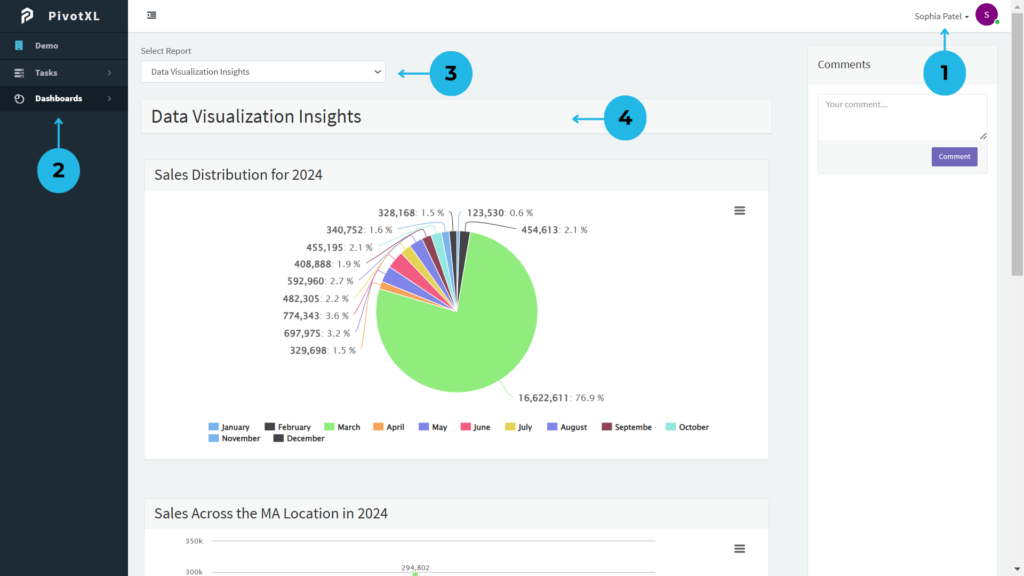
1.Start by logging into the application using your User account credentials.
2.From the left main menu, head over to the Dashboard section to access your reports.
3.In the Select Report section, view and select the shared report that has been made available for you.
4.The report is now accessible by the user within their account, ready for viewing and analysis.
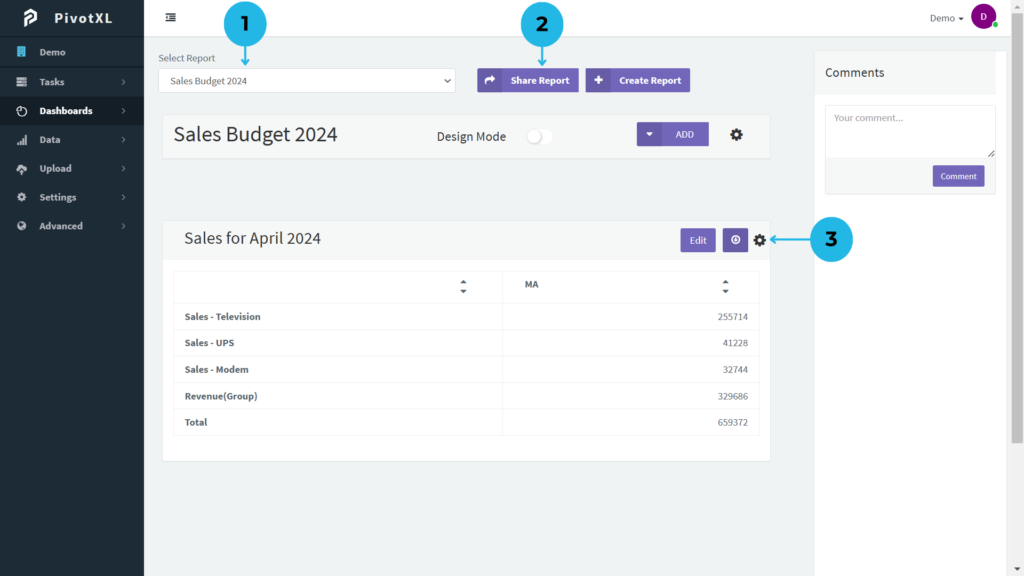
1.Log in to PivotXL with your Admin account, and navigate to the Dashboard section from the left-side menu. Select the report that contains the table you wish to share.
2.Click on the Share Report button, then choose specific users or use the Select All option to grant access to the report. This allows the selected users to view the table but not update any values, as they are restricted to view-only access.
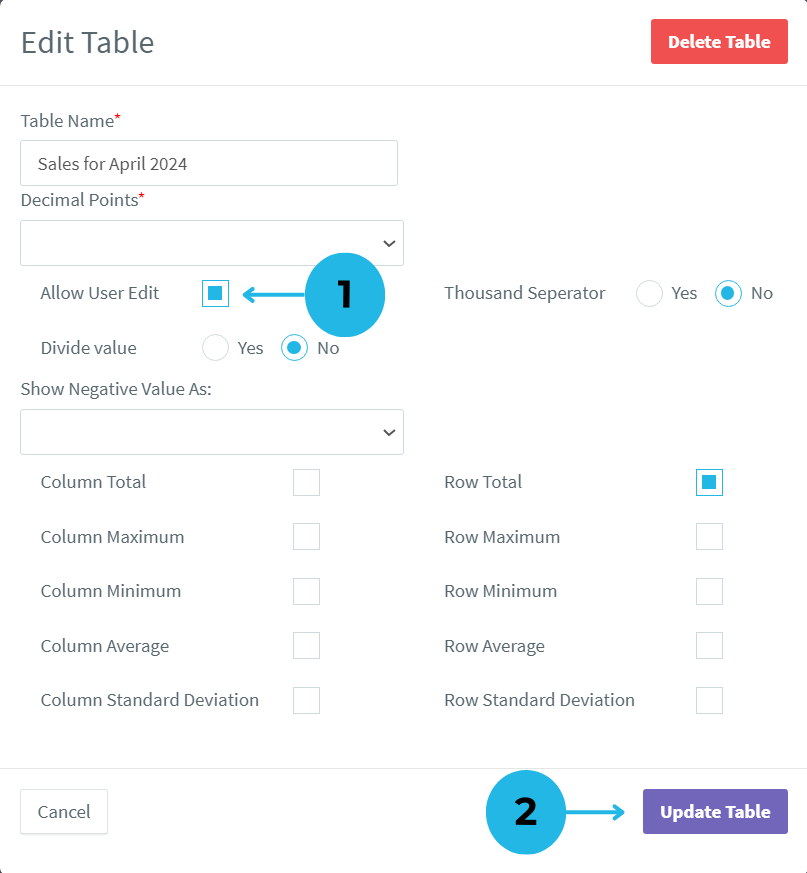
3.Click on the Settings icon to modify the table’s configuration and enable editing access for the values if needed.
- Mark the checkbox in the Allow User Edit section to grant users permission to edit the table’s values.
- After making the necessary changes, click the Update Table button to save and apply the updates.
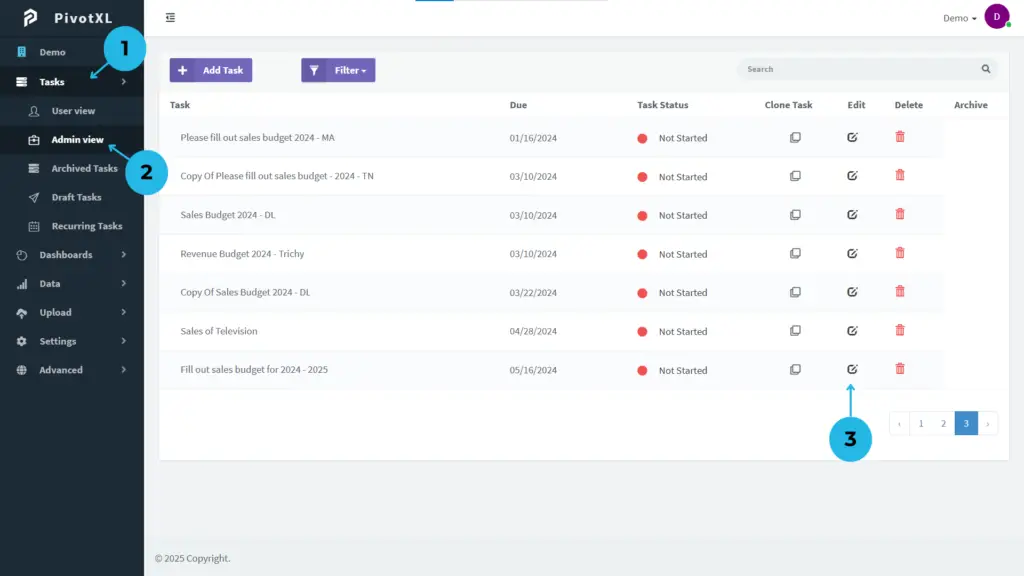
1.Navigate to the Task section in the left-side main menu to access the child menus.
2.Select Admin View from the child menu under the Task section to manage and view tasks.
3.Click on the edit icon to modify or review the task details.
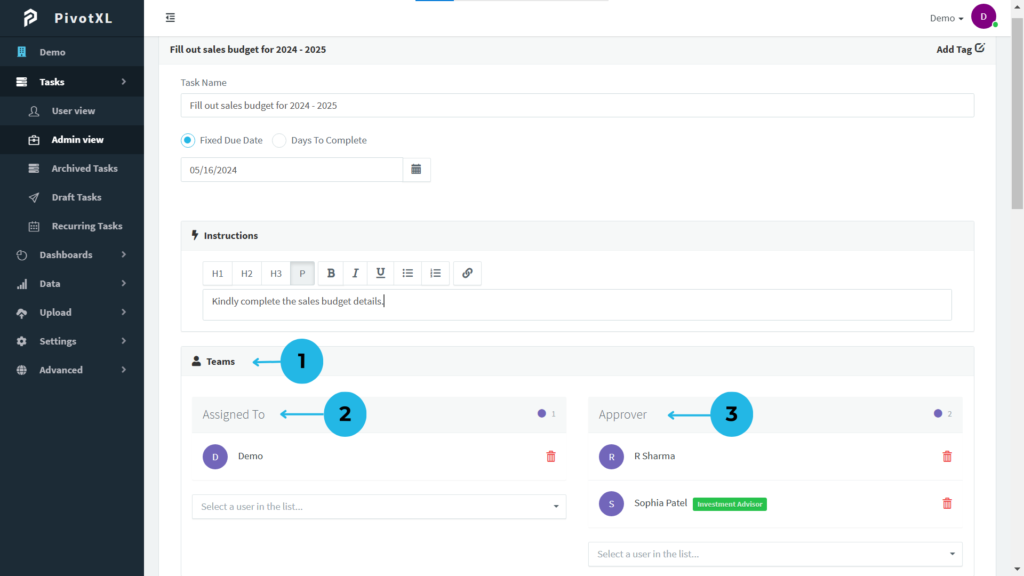
1.The task will display the Assignee and Approver within the Teams section for easy tracking.
2.Non-admin Assignees can access the task under the Assigned To section for their action.
3.Non-admin Approvers are able to access and approve tasks in the Approver section.
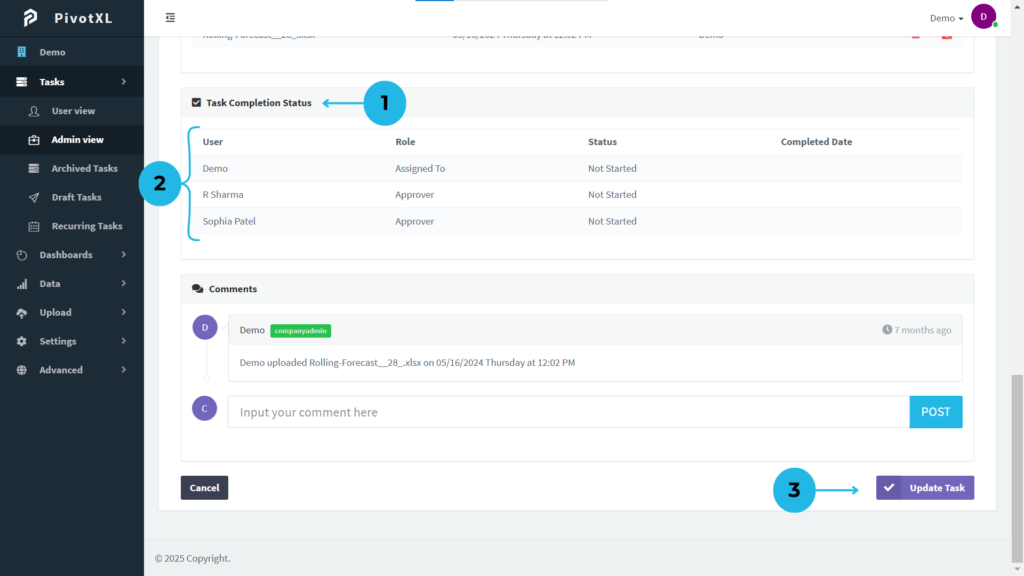
1.Monitor task progress with the Task Completion Status section, which also allows tracking of user activities for better task management.
2.View the list of users in the Task Completion Status section to track progress and activity.
3.Once all modifications are complete, click the Update Task button to save and apply the changes for seamless task management.
Auditing User Activity
Track user actions to maintain accountability and transparency. PivotXL provides detailed logs of user activities, helping administrators monitor data changes and detect any unauthorized access or suspicious behavior.
1.Navigate to the Users section under the Settings menu to review user activity and status.
2.The Admin Users Status section displays two states: Active and Not Active.
- Active status indicates users who are currently engaged and live in the PivotXL application.
- Not Active status applies to those who haven’t completed the setup after the admin account creation.
3.Similarly, the Non-Admin Users Status section also shows Active and Not Active statuses.

