


Integrating QuickBooks with PivotXL allows you to automate data imports, simplify your reporting workflows, and ensure accuracy across your financial planning processes.
Note: QuickBooks is registered trademark of Intuit Inc. Used with permission.
Benefits of QuickBooks Integration with PivotXL
- Automated Data Import: Seamlessly fetch your Trial Balance and financial data from QuickBooks into PivotXL without manual uploads.
- Accurate Financial Reporting: Reduce manual entry errors by automatically syncing QuickBooks data into your PivotXL cubes for structured financial analysis.
- Faster Planning Cycles: Leverage real-time data to speed up your budgeting, forecasting, and month-end reporting workflows.
- Integrated Cube Analysis: Map QuickBooks data into PivotXL’s powerful cube structure to analyze financial performance with customizable fields and dimensions.
- Operational Efficiency: Free up your finance team’s time by automating repetitive tasks and focusing on decision-making and analysis.
- Secure and Reliable: PivotXL uses secure API-based connections to ensure your financial data is transferred safely.
📘 For detailed information about PivotXL, please refer to our documentation.
QuickBooks Integration in PivotXL: Step-by-Step Guide
Follow these steps to connect QuickBooks with your PivotXL:
Step 1: Sign In or Sign Up in PivotXL
Go to PivotXL and sign in to your account.
If you don’t have an account, sign up to get started.
Step 2: Create a New Integration
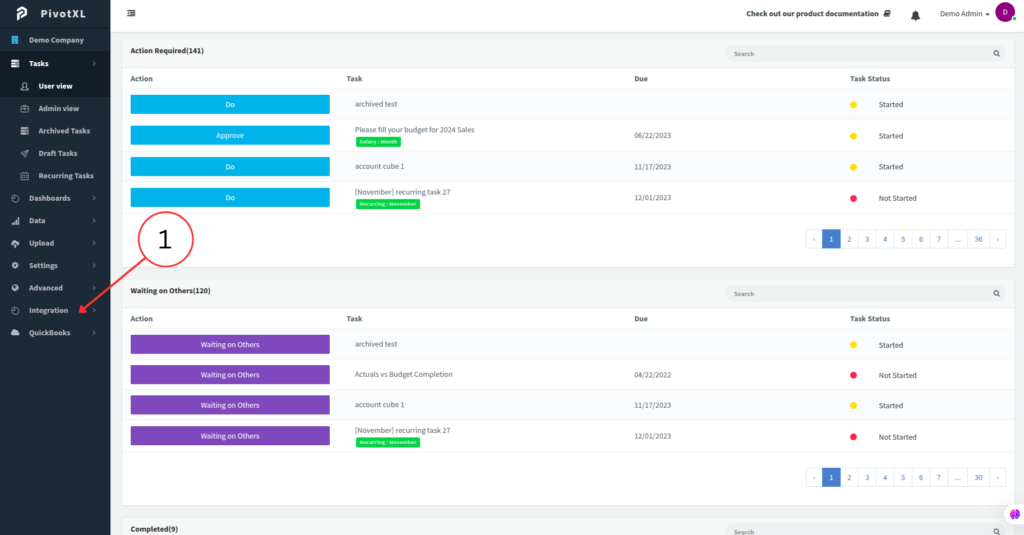
1.Click the Integration menu in the sidebar.
Note: If you cannot find the “Integration” menu, please contact our support team.
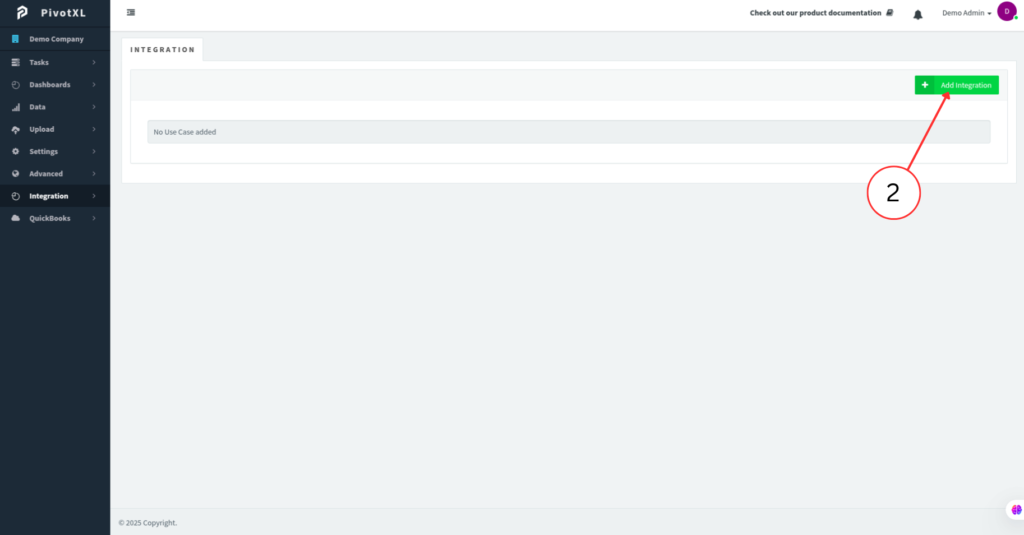
2.Click the Add Integration button. A pop-up window will appear.
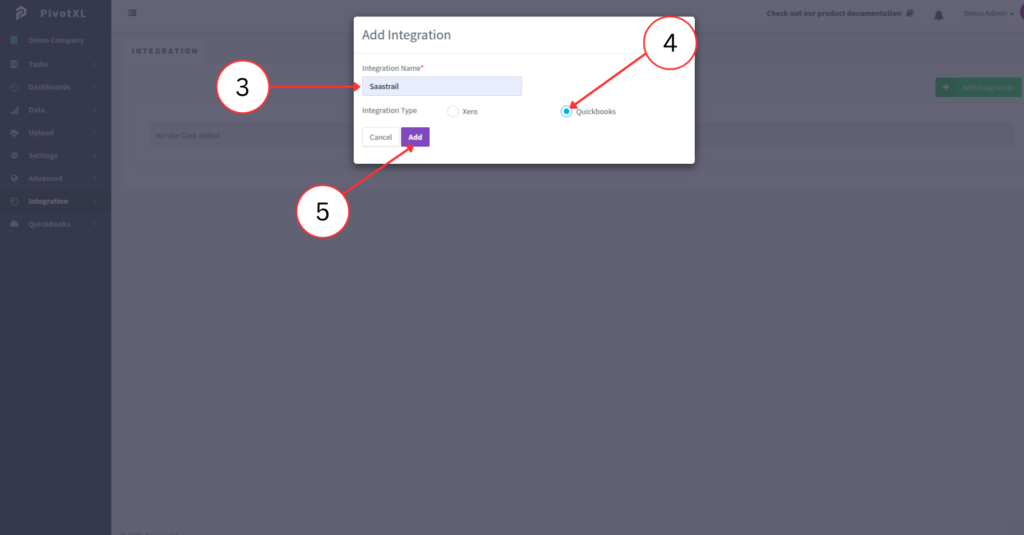
3.Enter your Company Name.
4.Select QuickBooks as the Integration Type.
5.Click the Add button.
Now the integration for the company will be created. Let us connect it with QuickBooks.
Step 3: Connect PivotXL with QuickBooks
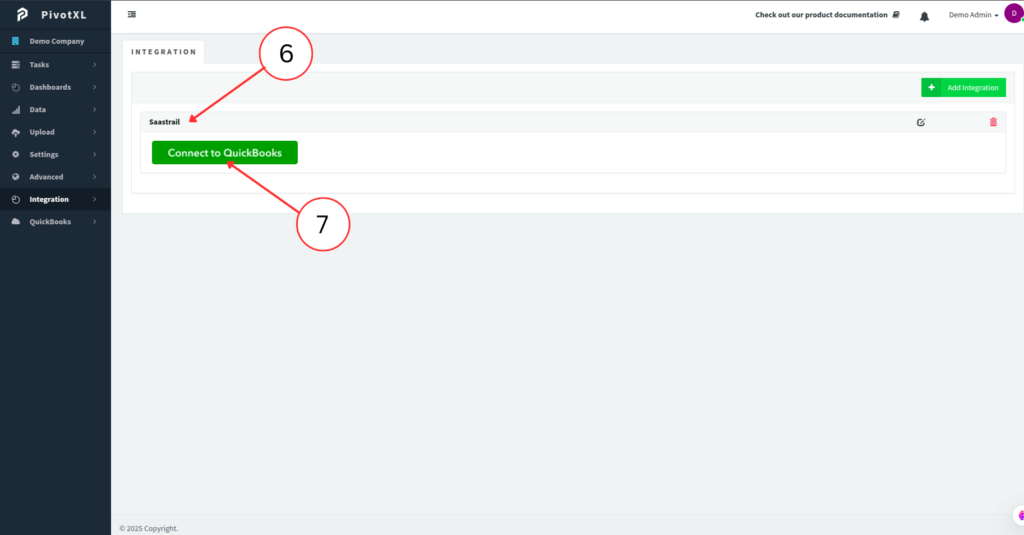
6.Click the integration you just created.
7.Click the Connect to QuickBooks button. A new page will open.

8.Sign in using your QuickBooks login credentials.

9.Select your QuickBooks company and click the Connect button.
PivotXL is now connected with your QuickBooks account.
Step 4: Import Trial Balance Data
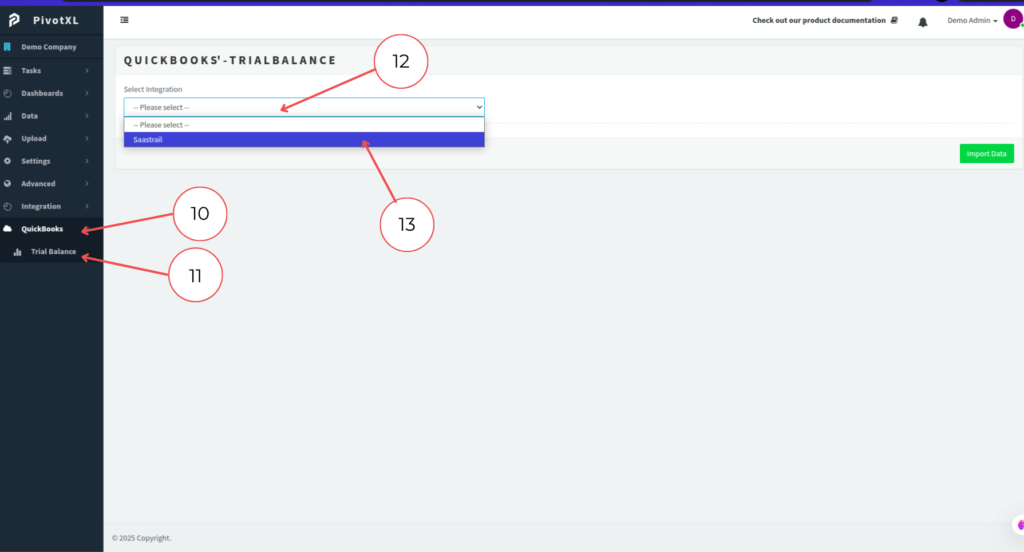
10.Click the QuickBooks menu.
11.Select the Trial Balance submenu.
12.A dropdown will display your integrated companies.
13.Select the company you wish to import data from.
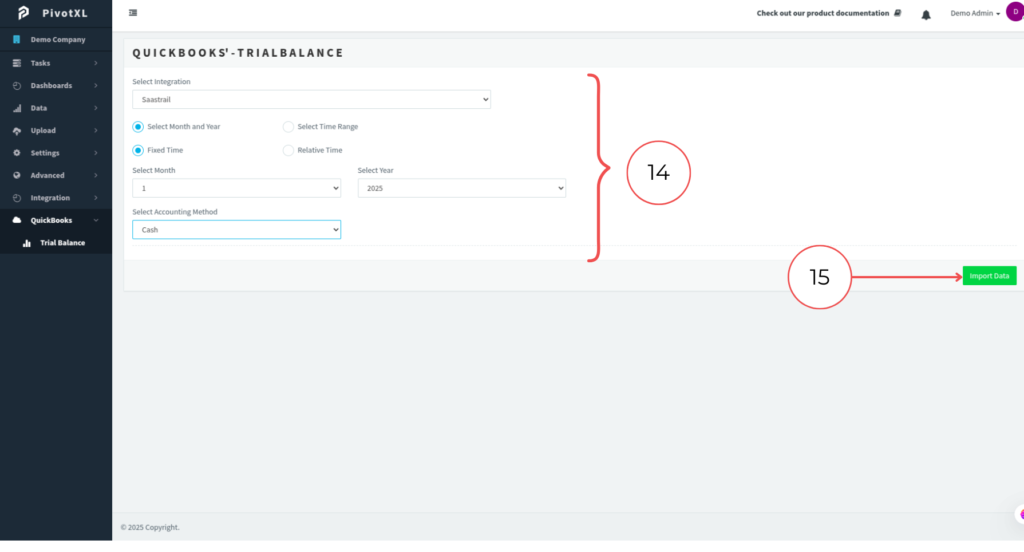
14.Choose the required month, year, and accounting method.
15.Click the Import Data button to fetch the trial balance data for the selected period.
Step 5: Upload Data to Cube
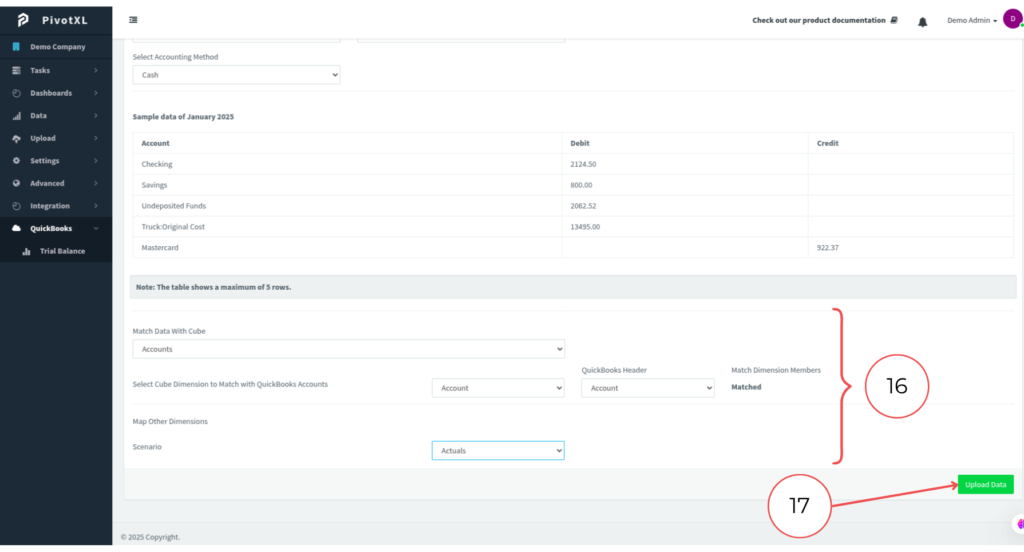
16. Select the required fields for your cube.
17.Click the Upload Data button to upload your QuickBooks data into PivotXL’s cube structure.
Note: Explore more about cubes and their usage in our documentation.

