


Keeping your data in sync between Google Sheets and Excel is absolutely essential for seamless collaboration and efficient data management. Moreover, if you frequently switch between these platforms, understanding how to sync Google Sheets to Excel can significantly save you both time and effort. Fortunately, there are several simple methods available that make this process easier than ever.
In this guide, we will carefully walk you through step-by-step instructions to connect Google Sheets with Excel automatically. Additionally, we will explore different approaches, ensuring that you can choose the one that best fits your workflow. So, whether you prefer manual imports, Power Query, or Google Drive integration, you will have all the information needed to make an informed decision.
Therefore, without any further delay, let’s get started and simplify your data synchronization process today!
Why Synchronizing Google Sheets to Excel?
Syncing Google Sheets with Excel provides several benefits:
- Real-time updates: Changes made in Google Sheets automatically reflect in Excel. This ensures that your data remains up to date at all times.
- Collaboration made easy: Teams can work together on Google Sheets while using Excel for analysis. Therefore, no data is lost in communication.
- Offline access: Excel allows you to work offline with synced data, which is particularly useful when you don’t have internet access.
- Advanced Excel functionalities: You can use Excel’s powerful formulas and visualization tools on Google Sheets data. As a result, your data analysis becomes much more efficient.
Learn more about Sync Google Sheets to Excel.
Method 1: Import Google Sheets Data into Excel (Manual Refresh)
One simple way to sync Google Sheets to Excel is by using the web query feature in Excel. Not only is this method easy to follow, but it also ensures that your data stays updated seamlessly over time. This method is great if you don’t need real-time updates but still want to import data efficiently.
Step 1: Publish Google Sheets to the Web
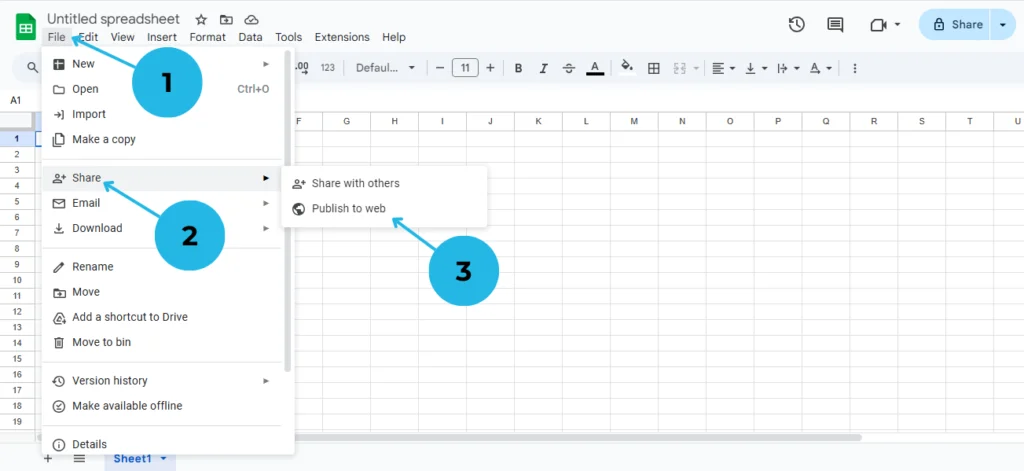
- Open your Google Sheet and Click on File.
- Click on Share in the dropdown.
- Click on Publish to the web.
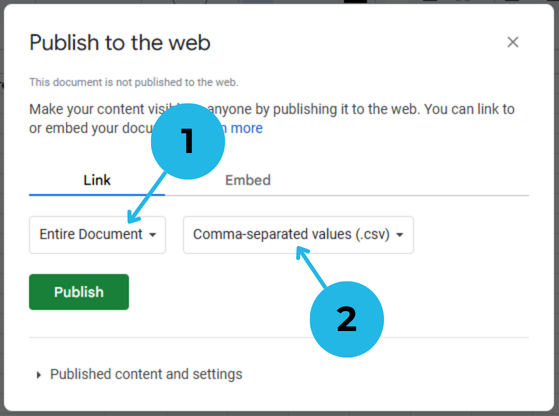
- Select Entire Document or a specific sheet, depending on your needs.
- Choose Comma-separated values (.csv) format, as this works best for Excel.
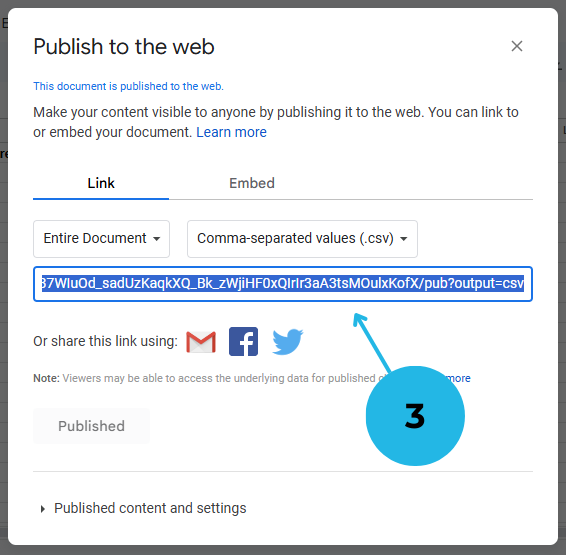
- Click Publish and copy the generated link.
Step 2: Import the Data into Excel
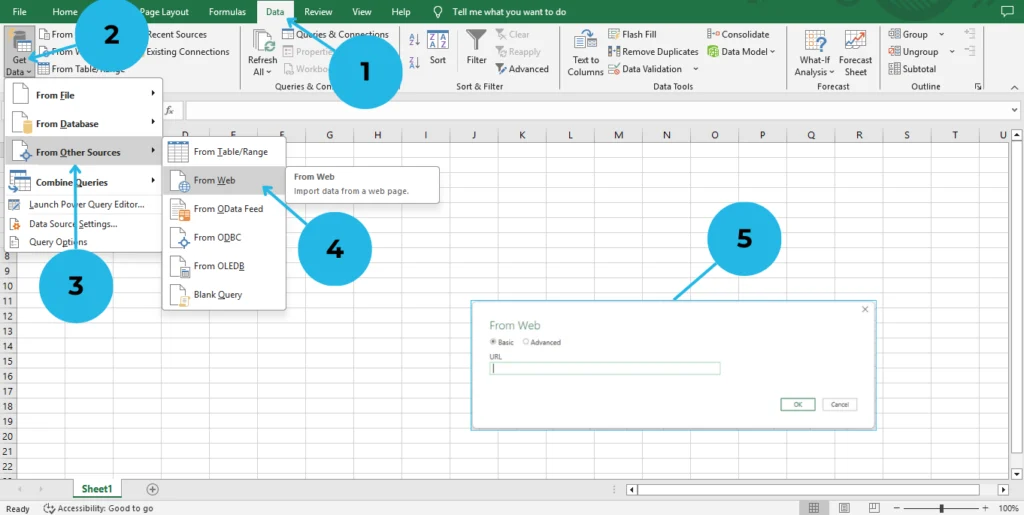
- Open Microsoft Excel and Click on Data.
- Click on Get Data.
- Click on From Other Sources.
- Select From web.
- Paste the copied link and click OK and Follow the prompts to load the data into an Excel sheet.
- Click Refresh anytime to get updated data from Google Sheets. This way, your data stays current without requiring a full reimport.
Method 2: Use Power Query for Automatic Sync
Power Query allows you to automatically update your Excel file when Google Sheets changes. This method is ideal for live updates, as it refreshes data automatically.
Step 1: Get the Google Sheets URL
- Open your Google Sheet.
- Click File > Share > Get link and set access to Anyone with the link can view.
- Copy the link to use in Excel.
Step 2: Connect with Power Query
- Open Excel and go to Data > Get Data > From Other Sources > From Web.
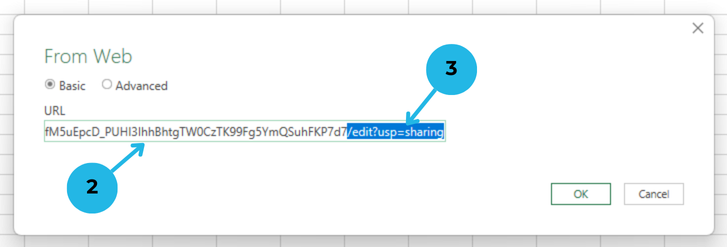
- Paste the Google Sheets link.
- Modify the URL by replacing
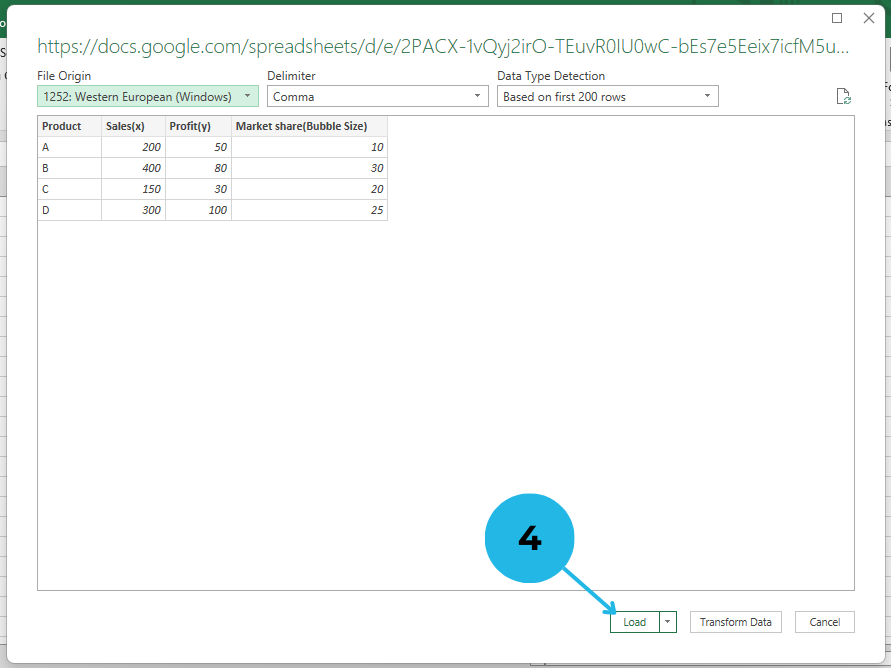
/edit?usp=sharingwith/gviz/tq?tqx=out:csv. This step ensures the data is formatted correctly. Then click ok. - Click Load to import data.
- Simply click Refresh All in Power Query to update automatically. This way, your Excel sheet will always display the latest information without any extra effort.
Method 3: Use Google Drive Integration with Excel
For seamless synchronization, use Google Drive’s automatic backup feature to keep files updated effortlessly. Not only is this a convenient method, but it also ensures that you can access your files directly from your local drive without any hassle.
Step 1: Install Google Drive for Desktop
- First, download and install Google Drive for Desktop from the official website. Then, sign in with your Google account. After that, select the Google Sheets folder for syncing to ensure your files are always up to date.
Step 2: Access Synced Files in Excel
- Open File Explorer and go to the Google Drive folder.
- Open the synced Google Sheet in Excel.
- Save it as an Excel file (.xlsx) for offline access. That way, you can work without needing an internet connection.
Best Practices for Keeping Data in Sync
- Use Power Query for real-time updates instead of manual imports. This will save you a lot of time.
- Check access permissions when importing Google Sheets data. Otherwise, you may encounter errors.
- Automate refresh schedules in Excel for updated reports. This ensures you always work with the latest data.
- Backup important data before making changes. That way, you won’t lose critical information.
Final Thoughts
Syncing Google Sheets to Excel can greatly enhance workflow efficiency, especially when dealing with large datasets. Moreover, keeping your data updated across both platforms ensures accuracy and saves valuable time.
First of all, manually importing data allows you to transfer information quickly, though it requires regular updates. On the other hand, Power Query offers a more automated approach, enabling you to refresh data with just a few clicks. Additionally, integrating Google Drive provides a seamless connection, ensuring that changes made in Google Sheets automatically reflect in Excel.
Furthermore, choosing the right method depends on your specific needs. If you require real-time updates, Google Drive integration is an excellent choice. However, if you prefer more control over data imports, Power Query might be the best option. Regardless of your preference, these techniques will help streamline your workflow and eliminate the hassle of manually updating spreadsheets.
For more Excel tutorials, explore our latest guides on PivotXL!
